Guide to VSCO Cam editing features

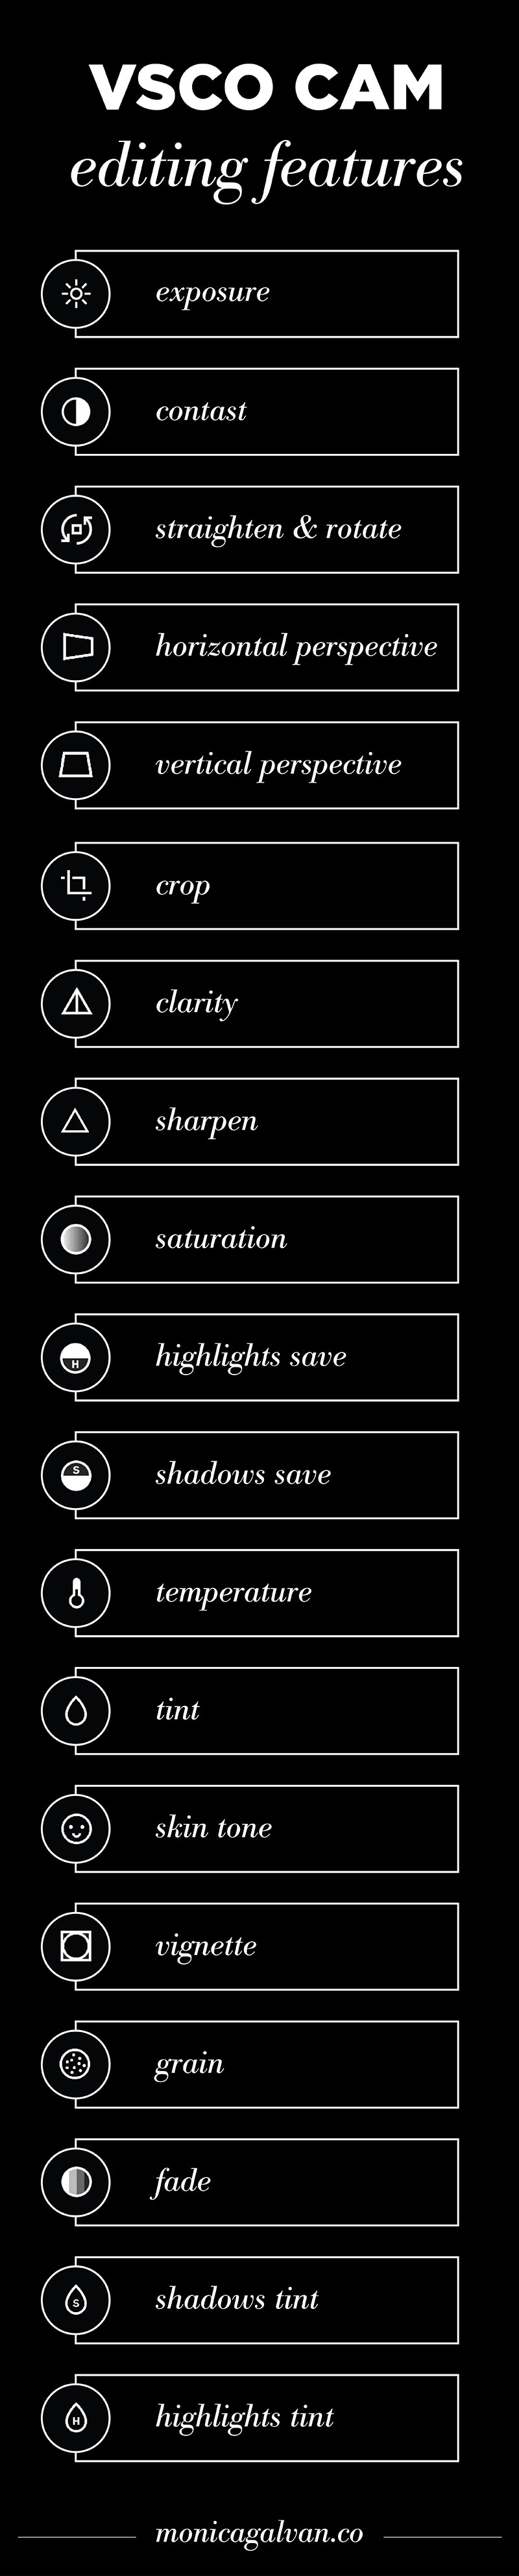
Cheat Sheet Guide to VSCO CAM Editing Features
There are so many options to edit your photos with VSCO CAM! It can be overwhelming. I created a cheat sheet to help streamline your mobile editing process.
Everyone loves infographics! Here's a Pinterest version for you to pin (go ahead, you know you want to)!
A Step by Step Guide to VSCO CAM Editing Features
Editing with VSCO CAM is a two step process. First, choose your preset. Then use the editing panel to fine tune your photo. If this is your first time using VSCO CAM, I highly recommend experimenting with the editing features to get a feel for what they do and how they affect your photos. To access the editing panel, use the wrench icon (to the right of the paintbrush icon).
Exposure
Exposure adjusts the brightness and darkness of your photo. Usually you only need to adjust this by one or two stops. But to really show the drastic affects of these editing features, I show extreme examples so you can quickly see the impact.
The left image is completely underexposed, the shadows of the buildings are now shapes filled with black.
The far right image is an example of an over exposed photo. Usually this results in blown out details, notice how the cloud is no longer visible and the top of the Transamerica Pyramid disappears into the sky?

Contrast
Contrast adjusts the scale of difference between black and white in your photo. Low contrast images, like the one on the left, appear flat and dull since they don't show a range between lights and darks. They look hazy like a cloud of dust blew into the frame. High contrast images on the other hand, show a full range of tones in shadows and highlights. Photos taken at high noon immediately give a high contrast look without much of a range in tones. When I first started editing photos several years ago, I made the newbie mistake of always cranking the contrast of my images as far up as possible. In time I learned to balance and use it sparingly.

Straighten or Rotate
This tool comes in handy when you want your image to be straight even if the original is off center. It's great for achieving a straight horizon line in landscape photography. Here are extreme examples of how the straighten tool affects your photos. If you wanted to rotate, click on the icon above the checkmark (a square rotated on its side) to rotate 90 degrees at a time.

Horizontal perspective
Rarely will you need to use the horizontal perspective but it's a great tool for the right photo. One of the best uses for this tool is in architectural shots. Have you ever looked at a photo of a building unsure what it is but knowing there's something off about it? Most likely it's due to the perspective. Use this tool and the next (vertical perspective) to fix those distortions.

Vertical perspective
Just like the horizontal perspective tool above, you'll rarely need to use this one. It's best for correcting distortions on architectural shots. A note of caution for both the horizontal and vertical perspective, try not to use it to the extreme. It will lower the quality of your photos as it stretches the pixels.

Crop
With the crop tool there are four aspect ratios to choose from. An uncropped image is 3:4 or 4:3, depending if it's in portrait or landscape mode. Other options are square (1:1), 4:5, and 2:3 (perfect for photos of tall buildings or if you want to create the illusion of more negative space like in the photo below)!

Clarity
Clarity increases mid-tone contrast. It also results in lesser noise to the photo than the sharpening tool. It helps bring in more light and detail in this aerial city shot shown below. This tool is best used on buildings, architectural shots, and cityscapes as it brings out texture and details in photos.

Sharpen
The triangle icon sharpens images. 99% of the time I never use sharpening in my images, mobile or other otherwise. I find the effect too harsh. It's a preference but it may become a part of your style. Sharpening brings out the details, notice how the texture of the mural becomes more prominent in the transition of images below.

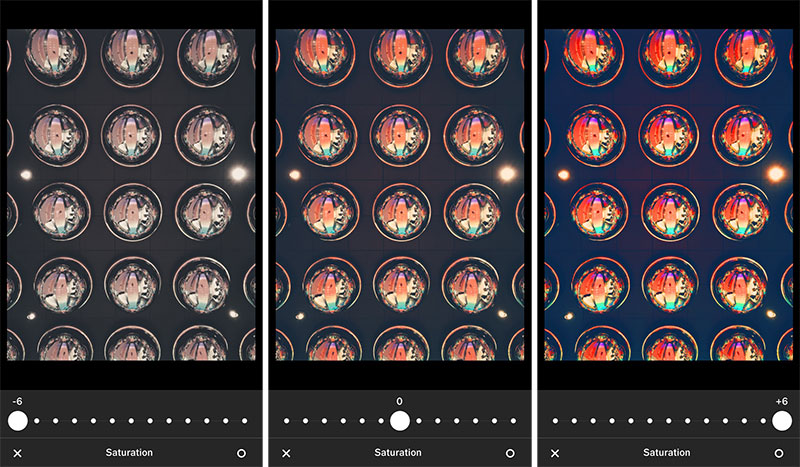
Saturation
The example image on the left is completely desaturated, meaning the color is removed. It's close to a black and white image but not quite, there's a slight tint. The far right image has way too much saturation, it's blinding! You can use saturation to bring out or push back the colors in your photos.
Highlights Save
The highlights save tool is great for toning back the brights of your over exposed image. I often use this to adjust skies on outdoor shots. The sky in the image on the left is too flat for my tastes, I prefer the middle option.

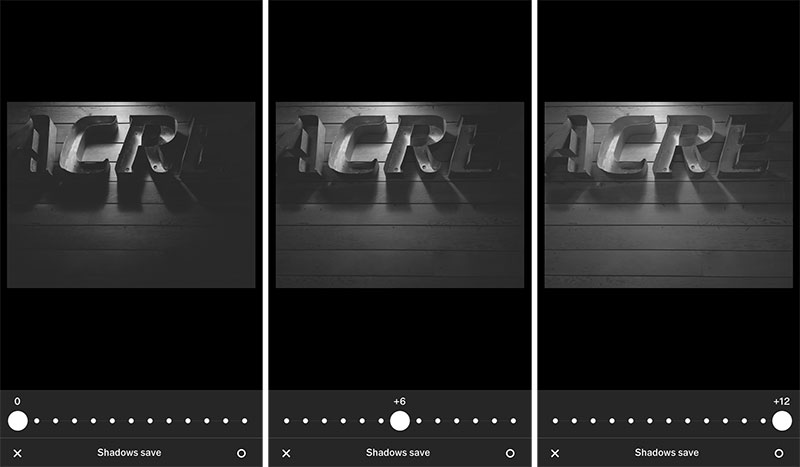
Shadows Save
The shadow save tool comes in handy when your image is underexposed. It helps bring back the detail in your shadows. A little goes a long way so I usually adjust by one or two stops. The image on the far right is back to a dull, flat look with not much contrast.
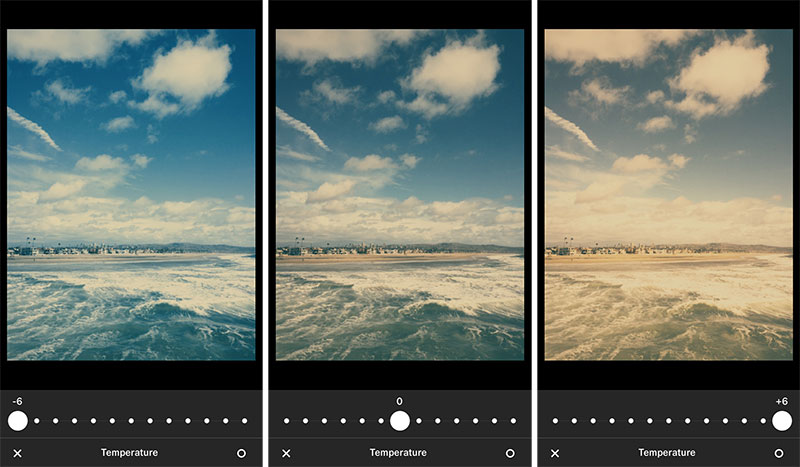
Temperature
I like to adjust temperature by one or two stops if I feel the image is either too cool or too warm. If you prefer cool toned images, rich in blues, push the slider to the left. If you prefer warmer tones, then push the slider to the right. In this sunset image (taken during the golden hour in San Francisco), you can see how temperature affects the colors.
Tint
The tint tool adds either green or purple hues to your photo depending on if you move the slider to the left or right. Since the green color in the mint is a focal point, it helps to enhance the green hue to draw more attention to its details.

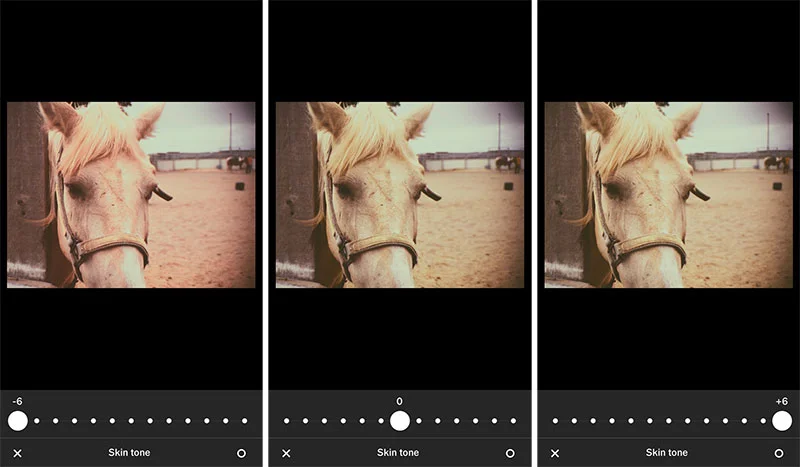
Skin Tone
This tool is mainly used to adjust skin tones within portraits but horses have skin tones too! Sliding to the left adds pink tones to the image while sliding to the right adds orange tones. If you love to shoot portraits, you'll use this feature often!
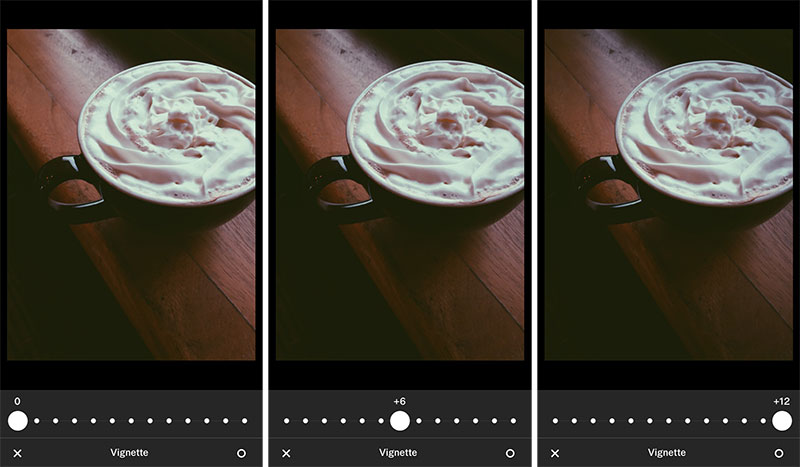
Vignette
Vignetting is one of my favorite tools! I use vignettes in 90% of my editing. I love how it draws your attention inward like in this photo where the focal point is the hole in the wood fence. It also adds a lovely gradation of colors in my color photos.
Grain
Another tool I rarely use in mobile photography is grain. I do however, add it to black and white photos from my DSLR. Why? Grain added to mobile images, if you're not careful, can make your images look poor in quality. Black and white film-like photography while remaining smooth in color is part of my style. Using the grain tool, you can add a level of texture, see the examples below.

Fade
I occasionally use fade by one or two stops on black and white photos to kick back some of the blacks. Too much fade leads to low contrast images and a loss of details like the example on the right.

Shadows Tint
I often gloss over the shadow and highlight tint tools but they can create interest in your images, adding a "vintage" look. A great way to use this tool is to add a level of contrast in the color of your images. In this example, I added an orange shadow tint to complement the blues of the sky. Less is more but you can get really creative with this tool and create some psychedelic photos!

Highlights Tints
The opposite of the shadows tint, the highlight tints tool adds color to your highlights. Notice how the gold outline of the roses becomes more creamy with the orange tint? Again, you can create some amazing affects with this tool if you experiment.
